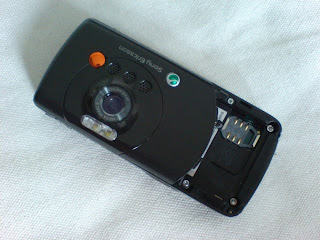
Sony Ericsson W810i disassembly
Tools required: Torx 6 screwdriver, Phillips screwdriver
Remove the back cover, battery and four screws you can see

Next run a fingernail along the edge of the antenna cover to remove it

Next run a fingernail along the edge of the housing to remove the front cover

With the front cover now removed you can access the keypad part. Lift this from left to right to remove. It clips onto the circuit board attaching like a plug and socket. Simply lift away and to unplug

Your phone will now look like below giving you access to the LCD screen

Flip the screen over from right to left to access the ribbon which connects the screen and circuit board. Unplug the ribbon by lifting it upwards. If you only need to replace the LCD you do not need to go any further in the disassembly procedure. Simply replace the LCD and reassemble

Unplug the ribbon indicated below. Slide the ribbon through the gap in the circuit board

Your phone should now look like the picture below and you have pretty much finished disassembly. Other parts still in the chassis, like the buttons, camera etc will pop out very easily if need be
 Next run a fingernail along the edge of the antenna cover to remove it
 Next run a fingernail along the edge of the housing to remove the front cover
 With the front cover now removed you can access the keypad part. Lift this from left to right to remove. It clips onto the circuit board attaching like a plug and socket. Simply lift away and to unplug
 Your phone will now look like below giving you access to the LCD screen


No comments:
Post a Comment