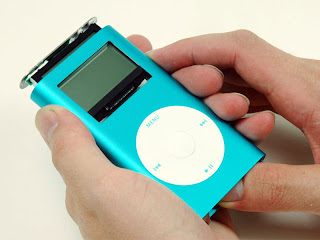
Installing iPod Mini Display
Replace a cracked or faulty display.
Tools used in this guide : Phillips #00 Screwdriver , Small Flathead Screwdriver , Spudger
Parts relevant to this guide : iPod Mini Gen 1 Display , iPod Mini Gen 2 Display

Step 1 — Top Bezel
Before opening your iPod, ensure that the hold switch is in the locked position.

Step 2
Carefully insert a small flathead screwdriver in the seam between the metal casing and white plastic top. Use the screwdriver to pry up the white plastic top bezel. Be careful not to damage the soft plastic with your screwdriver.
The top bezel is held on with an adhesive, so it may be necessary to pry up in several different locations to free the part.

Step 3
Lift the top bezel off of the iPod.

Step 4 — Bottom Bezel
Carefully insert a small flathead screwdriver in the seam between the metal casing and white plastic bottom Use the screwdriver to pry up the white plastic bottom bezel. Be careful not to damage the soft plastic with your screwdriver.

Step 5
Use a flathead screwdriver to pry out the metal retaining bracket beneath the bottom bezel. You can free the bracket by first pushing in the metal arms on the corners and then lifting the bracket

Step 6
Lift the metal retaining bracket out of the iPod.

Step 7 — Battery
Use a spudger or the tip of your finger to carefully disconect the orange click wheel ribbon from the logic board.

Step 8
Remove the two #00 Phillips screws securing the headphone jack to the casing.

Step 9
Carefully slide the iPod out of its casing by pushing on the logic board near the bottom edge of the click wheel.
Do not pull on the headphone jack board at the top of the iPod, as the connector to the logic board is fragile.

Step 10
After pushing the logic board out sufficiently, gently grasp the logic board on either side of the display, and continue to slide the iPod out of its casing.

Step 11
Lift the battery off of the logic board and lay it to the side of the iPod.

Step 12
Use a spudger to flip up the black plastic tab holding the orange display ribbon in place. The black tab will rotate up 90 degrees, releasing the ribbon cable.

Step 13
Note the location of the four white plastic tabs securing the display to the logic board. These tabs must be released before the display can be removed.

Step 14
Use a spudger or your finger to free the four white plastic tabs indicated in the previous picture.

Step 15
Turn the iPod over.
Carefully lift the display up and slide it out of its connector.
Congratulations!
To reassemble your device, follow these instructions in reverse order.


No comments:
Post a Comment