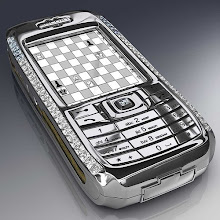
Tools required: Phillips size 0 screwdriver, plastic tool such as a credit card or guitar plectrum
Remove your back cover, battery, sim etc. Remove the two screws you can see.
 Use a thin plastic tool, such as a credit card, to remove the surround for the keypad.
 Now lift the keypad up to reveal two more screws. Remove these screws.
 The part shown below will now be loose and can be removed.
 Lift the green circuit board to the left of the phone (it'll be held in place by a small plastic clip) and a ribbon and connector (circled in white) will disconnect. The ribbon and connector attach like a plug and socket. Now remove the screws (circled in red).
 The battery compartment can now be removed. It should come away with little force.
 Remove the sticker, as shown below, to reveal two more screws. Remove these.
 The slide will now move a little further down and you can access the two circled metal clips. Bend these back slightly.
 You can then remove the part shown below, revealing two more screws for you to remove.
 Run something like the edge of a credit card around the edge of the metal slide assembly and it will now come away from the phone. Note that it'll still be connected by a ribbon (circled). Again, this attaches like a plug and socket. Lever it up and it'll disconnect quite easily.
 Your phone should now look like below. Disconnect the ribbon circled in red. Again it attaches like a plug and socket. Lever the LCD screen out at the points shown by the arrows below.
 Your phone should now look like below. Disconnect the ribbon, circled. Again, it attaches like a plug and socket.
 Now peel the ribbon, which has the navi pad attached to the end, away from the back of the LCD. It's stuck down lightly with double sided tape. You should now have the LCD removed. Reverse the whole procedure for reassembly.

No comments:
Post a Comment